
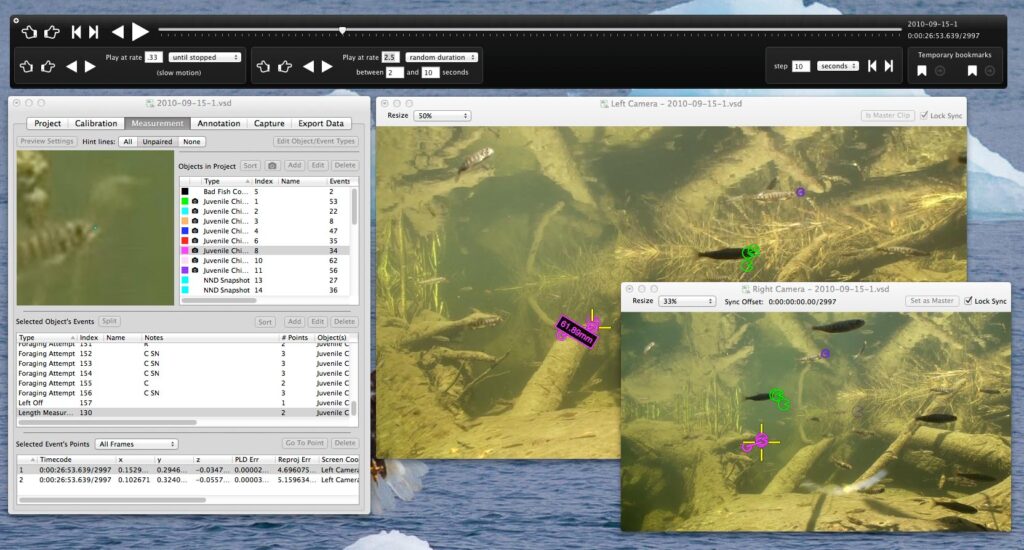

More features of VidSync
Easy calibration
The two objects required to calibrate videos for measurement are easy and inexpensive to build (a few hundred dollars at most). Actual calibration takes about 5 minutes in the field or lab, and about 10 on the computer once you’re familiar with the process. A new user can learn the process from scratch in less than an hour.
Measurement accuracy and the magnified preview

Although VidSync’s mathematical methods are capable of sub-millimeter accuracy, your measurements are only as good as your input. VidSync has some powerful tools to let you quickly input points for measurement with as much precision as you want.
When you click on a point to measure in VidSync, you don’t need to worry about exactly where you’re clicking, or which pixel on under your mouse pointer is being measured. A magnified, live preview image of the video places a tiny dot (or an elaborate reticle) directly over the point you’re measuring. After clicking, use the arrow keys to manipulate the measurement position with sub-pixel precision.
Advanced playback control
VidSync replaces the standard Quicktime playback controls with a new control bar tailored for scientific analysis. We often need to be able to stop immediately when we observe something of interest, then back up and re-watch it two or three times, maybe at different speeds. Or maybe we need to jump around the video at fixed intervals (or systematically randomized ones). In a normal video player these tasks are distractingly awkward. In VidSync they’re so easy that after the first hour or two you aren’t even thinking about them.

Easy organization, annotation, and retrieval of measurements
VidSync organizes measurements into a hierarchy of “objects,” such as fish, and “events,” such as prey capture attempts. Each event may have multiple measured points. Events (such as a conflict between fish) can also be associated with multiple objects (i.e. Vidsync supports many-to-many relationships).

Objects determine the color of the symbol that overlays the video to indicate measured point (for example, I give different fish different colors). Events determine the size and shape of the symbol, how long it stays onscreen, whether it’s connected by a line to other points in the same event (e.g., for a length measurement event), and other visual properties. You don’t have to set these attributes for every individual event. Instead, you define event types (i.e. length measurement, prey capture attempt, etc.) and individual events take on the properties of their type.

Many small features of this system have a large effect on the ease with which you can record and retrieve measurements:
- You can add arbitrary notes to every object or event, useful for sophisticated coding of observations.
- The point selected in the lists shows a square crosshair selection indicator around its symbol on the video overlay.
- You can select a point through the menus and click “Go” to jump the video to its location.
- You can right-click near a point on the video overlay to select it in the lists, and click “Go” to jump to the frame on which it was recorded.
- You can split an object into two, or merge two objects into one, preserving all the measured events.
- Sort the lists by any field, or use the “Sort” button for the default order (first type, then index, then name).
This system has some very flexible applications. Below, I used it to digitize the boundary of the woody debris behind the fish, for estimating distance-to-cover, as well as the river bottom.

